
Showing posts with label Treat Holder. Show all posts
Showing posts with label Treat Holder. Show all posts
Aug 10, 2011
Tres Chic Hand bag

May 31, 2011
Hot Chocolate Treat


May 30, 2011
Lollypop Cutie

Apr 16, 2011
Easter Bunny Punch Art Treat Card

I wanted to make an Easter card for each of my three little grand daughters using these cute chocolate carrots I found at the shops...the punch art bunny was inspired by some Easter packaging on some other Easter goodies I bought... I have used 1 3/4 circle punch, small, large and wide ovals and 1/2 inch circles for the eyes...don't think the carrots will last long!
To make the bunny
The head is a 1 3/4 circle punch. To make the ears punch two large ovals and trim them so they are narrower at one end. Punch two small ovals in pink and trim them so they are also narrower at one end. layer the pink ovals on the large ovals behind the top of the head. To make her arms punch two wide ovals. Trim a little off the bottom of each one and trim each side making it narrower one end. Add pen detail. Stick one of the arms behind the bottom of the head (wide end at bottom). Punch another wide oval for the body and stick it behind the head and the arm. Use a template to cut out an oval then use scissors to cut jagged edges across the ovals width. Place the punch art bunny behind the oval leaving his arm to hang over the sides. Use glue dots to attach the chocolate carrot (or a punch art one) then glue the second arm behind the carrot wrapping it around to the front and attaching with another glue dot. His muzzle was made using a one inch circle punch trimmed top and bottom, rounding the corners. I used a stamp for his mouth but you could draw that by hand. The nose is the heart from the Owl Punch. The eyes are 1/2 inch circles punched in white with 1/4 inch circles punched in black for the pupils. The eye lids are 1/2 inch circles punched in half. I have added lashes with black pen. The colours used are naturals Ivory for the bunny with Blushing Bride for the pink bits. Everything was inked before assembly. Clear as mud!
To make the bunny
The head is a 1 3/4 circle punch. To make the ears punch two large ovals and trim them so they are narrower at one end. Punch two small ovals in pink and trim them so they are also narrower at one end. layer the pink ovals on the large ovals behind the top of the head. To make her arms punch two wide ovals. Trim a little off the bottom of each one and trim each side making it narrower one end. Add pen detail. Stick one of the arms behind the bottom of the head (wide end at bottom). Punch another wide oval for the body and stick it behind the head and the arm. Use a template to cut out an oval then use scissors to cut jagged edges across the ovals width. Place the punch art bunny behind the oval leaving his arm to hang over the sides. Use glue dots to attach the chocolate carrot (or a punch art one) then glue the second arm behind the carrot wrapping it around to the front and attaching with another glue dot. His muzzle was made using a one inch circle punch trimmed top and bottom, rounding the corners. I used a stamp for his mouth but you could draw that by hand. The nose is the heart from the Owl Punch. The eyes are 1/2 inch circles punched in white with 1/4 inch circles punched in black for the pupils. The eye lids are 1/2 inch circles punched in half. I have added lashes with black pen. The colours used are naturals Ivory for the bunny with Blushing Bride for the pink bits. Everything was inked before assembly. Clear as mud!
Apr 6, 2011
Tea Bag Holder


Mar 31, 2011
Easter Bunny Treat Card

Feb 28, 2011
Sweet Treats!


Feb 24, 2011
Pillow Box Wedding Favour

Feb 16, 2011
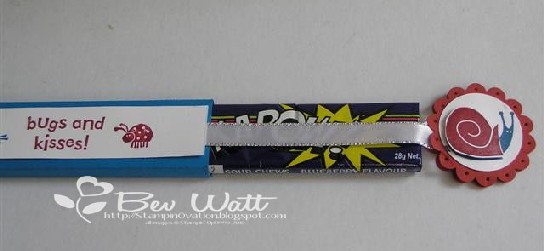
Treat Slider

Feb 10, 2011
Valentine Mini Treat


Jan 9, 2011
Valentine Treat Holder
I was at Woolies the other day and I spotted some boxes of indidually wrapped Turkish Delights...yum...I have made a very simple little treat holder to put them in
 I stamped the front with hearts from I Heart Hearts and the stems are from the set "For Everything".
 I used the full heart punch on the inside and added the turkish delight...a simple little project I will add to next weeks stamp club


Nov 26, 2010
Adult Version of Reindeer Poop
Hi everyone, not too many sleeps til the fat guy comes!! I have so much to do before Christmas, I need a remote with a pause button! Next week I am doing a kids class and one of items we will be making is reindeer poop...kids love that kind of thing....but I have also come up with a version for my adults class
 This is the outside. I used the owl punch to make a reindeer..not my idea I might add, someone very clever thought of that little gem...I wasn't wearing my glasses when I stamped the sentiment..I thought it said have a very merry christmas!. Inside there is a little plastic tube filled with chocolate coated peanuts for poop. I have written my own version for my class ladies who all have a sense of humour...if you are offended by swear words please don't scroll down
 Well I thought it was funny..I will be making several of these lol!
And now humour me for a proud mum moment..My youngest daughter just had her senior formal....so next year no more kids at school..yippee!!!!!!!!!!!!!
 Ebony looked like a princess...and her boyfriend Zac looked handsome too.
 Congrats to Ebony and Zac on your graduation too!!!!


And now humour me for a proud mum moment..My youngest daughter just had her senior formal....so next year no more kids at school..yippee!!!!!!!!!!!!!


Oct 28, 2010
Owl Christmas Treat

I thought this would be good for our class bonus project this week..(I don't think I will ever get sick of Mr Owl..) It is quite clear I am being ripped off when I buy smarties...I wanted to use only red and green, but lo and behold there were hardly any of those colours, so I had to settle for non Christmas colours...what is this world coming to!! I also added a mini candy cane which comes wrapped and with a hangy doodad which is rather handy..The owls hat is handcut from Cherry Cobbler cardstock though it looks black in this unfortunate night time photo...I have made so much mess in my craft room I couldn't find my white gel pen to add highlights to the eyeballs so I will add them later..
Oct 23, 2010
ESAD Christmas Blog Hop

EEKK!! Can you believe how fast Christmas is approaching?? Its time to get a wriggle on with all those Christmas projects...hopefully you will find lots of inspiration on our ESAD Blog Hop
What is ESAD?
ESAD stands for Extra Special Australasian Demonstrators and it is an online group just for Australian and New Zealand demonstrators for Stampin’ Up!
We so love what we do and not only do we love to share it with our customers, friends, and wonderful blog visitors but we share our love for what we do with each other as Demonstrators. We run swaps, challenges, tutorials, product know how and cyberstamps and we are always there to help and support each other when its needed.
So if you are a Stampin’ Up! Demonstrator located in Australia or New Zealand then please feel free to click here to join our wonderful group.
I hope you enjoyed your visit to Keryns Blog.
Have fun with the rest of the Hop!!!
For my first two projects I purchased tutorials here.


For my kids cards I will be making these because lollies speak volumes! I used a treat cup on the front and lots of Little Leaves sizzlets to make the wreath. The greeting is from Heard From the Heart which I used to hold a candy cane ( a few glue dots help to hold the candy cane)

I am not a fan of gummy bears my self but all the kids I know love them!

My last project isa cute little gift I have made for my daughter....she loves making cocktails so when I saw these cocktail recipe cards at the reject shop for $2 I was very happy..they are the size of a deck of playing cards and each one has a christmas cocktail recipe...how cute!I took the measurements of the deck and made a slide cover with a lift up flap on the top so I could write a greeting on the inside.

The images on the cards reminded me of the Cheers to You stamp set so that is what I used to stamp on the front. I watercoloured the image and added some dazzling diamonds. The designer paper is Love notes again (love polka dots!) and I made some holly leaves with the large oval punch using the 1/2 inch punch to take "bites" out of the leaves .. the Old Olive satin ribbon finished it off.
That's all I have for you today, thanks so much for stopping by, you will now head off to see what Jan McAnulty has in store for you
Just in case you get lost along the way here is a full list of Blog Hop participants
1. Sharlene Torres
1. Sharlene Torres
2. Kim Conway
3. Andrea Lowcock
4. Jo Weedon
5. Narelle Hodges
6. Leonie Schroder
7. Pauline Bennetts
8. Aly Adcock
9. Tanya Bell
10. Monique Fielder
11. Julie Fettes
12. Jane Norrish
13. Keryn Campbell
14. Bev Watt (YOU ARE HERE)
15. Jan McAnulty
Oct 21, 2010
Candy Cane Mouse

I know this idea isn't new...when my kids were little we would make these out of felt to hang on the Christmas tree...For this version I used a template to draw an oval and when I cut it out i trimmed one end to make it a bit pointier. Her ears are made with the butterfly punch, the nose is a 1/4 inch circle with some stands of linen thread for whiskers.I used the 1/4 inch circle to punch the hole to thread the candy cane...it was a tight fit so I snipped it a little bit to make the hole a smidge bigger.
It's finished off ribbon and a Jewellery tag. I think I will make these for my grand daughter to give to her mates at Christmas time..
Oct 20, 2010
Christmas Treat Box

Just a quick little project today using an el cheapo take away box,. I used Love Notes designer paper and embellished with punched stars and a punch art Santa

I used Heard From The Heart to stamp a little banner and finished it off with satin ribbon...Because the container is quite small it doesn't take a lot of chocolate so this is a good one to make if you have to give quite a few gifts...I call it recession giving lol
Oct 14, 2010
Reindeer Candy Cane Holder


I thought these would look cute hanging on the Christmas tree...they would last until my grand daughters walked through the door lol...would be kind of cute to hand out to classmates as well
Sep 29, 2010
Recycled Treat Holder
Hi Everyone! I don't know how people manage to update their blogs on a regular basis, I seem to run out of time...but here is a simple offering for today..

This little treat holder is made from the packaging from my Stampin' Up! clear block....I cut designer paper to fit inside and also cut a piece of window sheet the same size as the paper to act as a barrier between the lollies and the designer paper.It will stop the colour rubbing off the lollies and ruining the paper..The front is stamped with Staz On ink (leave the block inside the packaging to do this so the plastic doesnt buckle when you try to stamp) . I half filled with lollies (since I ate the rest!!!) then added a stamped image from the level 2 stamp set Apple Blossoms. Its finished off with some Daffodil Delight ribbon...


Mar 5, 2010
Ooh La La Undies and Bra!

I have seen this idea all over the net and just had to make one...sooo cute!

The back of the card is a little bit cheeky! ha ha. I used Sweet Always designer paper and the cardstock is blush blossom. This is exactly what I look like in my jox.....ok ...you are right it looks nothing like me....but I figured granny undies and cellulite wouldn't look tso great lol.

A simple card I will be doing in a free workshop on Saturday..I think I have done this in every colour combo now!

I would like the thank the lovely Sandi McGyver for so willingly sharing this super cute bunny template...I will be making a few of these for the Grandies

And lastly this super easy little Easter Treat...I saw these very cute marshmallow bunnies at the shops and had to buy a pack...they are individually wrapped in a little cello packet so I just had to make a little pouch with a window...
I would also like to show you the double slider card I made but it has disappeared into thin air...which is a pain because we are making them in Stamp Club tomorrow night...looks like I will have to knock one up quick smart!
Jan 4, 2010
This Little Piggy (and more)

I have a kids class tomorrow and my dilema was the diverse age ranges..I needed something easy enough for the little ones to do but not too lame for the big kids...I think these will be ok...first up is the tired/bored piggy with a treat cup nose full of mini musks. I started off making a mouse but thought the treat cup looked just like a pig snout so I went with that idea instead

I thought a sticky note pad would be nice and easy too and added a punch art puppy to the front...He is a creation by Angie Kennedy on SCS...I used the 1 3/4 punch for his head and body and the word window punch for his patch and ears..

Lastly a jumbo clip bookmark..the bird is all glittery which isn't showing up in the image....kids and glitter??? we will see how that goes...
I will let you know how it all went....it's just lucky I know all the kids and they are all well behaved so my sanity should remain intact!
Subscribe to:
Posts (Atom)